

|
System Description and Operating Instructions - Page 2 To navigate this online manual for Wise/POS quickly, use the Table of Contents links along the right side of the page to skip to the section you wish to read. If you have further questions, please contact us at fred.wise@wiseinc.com. This documentation is proprietary to and is owned by Wise Electronic Systems, Inc., Windsor, PA, and is protected by United States copyright law. Copies may be made only to support licensed use of the software as defined in the WES Software License Agreement, by the licensed user specified therein. Copyright 2000
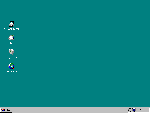
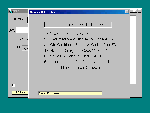
The following is a description of one method of starting the programs that make up the Wise/POS system. Experienced Windows users can probably skip this section, except, perhaps, for the special techniques needed on computers located at the check out location, which may have no pointing device. Start - Screen 1 is the basic screen
you will see when the computer has been started with a
basic Windows configuration. To start any of the POS
programs, first display the main start menu by any of
several methods available. If you are using an office
computer having a pointing device, the simplest method is
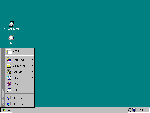
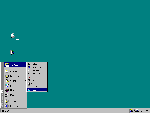
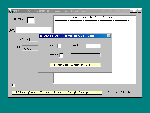
to move the mouse pointer to the When the start screen is displayed you can use the up/down arrow keys to highlight the WESpos menu listing or if a pointing device is available point to the WESpos entry. When using the arrow keys, as in the case of the point of sale terminal where a pointing device may not be available, use the right arrow key to show the WESpos sub menu. When using a pointing device the sub menu will automatically appear when the pointer is over the main menu listing. The next screen view shows the sub-menu display. Start Screen - 3 shows the full menu
displayed and the WESpos point of sale terminal program
highlighted. I arrived at this point by pressing the
Windows key on the keyboard then one press of the down
arrow, which highlighted the WESpos main menu listing.
With the WESpos highlighted, one press of the right arrow
key displayed the sub-menu and finally one press of the up
arrow key highlighted the WESpos point of sale program
menu item. I could have arrived at this location with the
pointing device also. Now pressing the To run any other program in the system you would highlight it in the same way and press the Enter key or click the left button. Many other options exist for starting the programs. One convenient method is to place shortcuts on the desktop. Consult the Windows help files for methods of creating shortcuts. The WESpos system files are located in the folder located at: C:\Program Files\WESpos General This section describes the use of the windows that constitute the main point of sale program. The first several views are what the check out person will see as items are entered into the system, either by typing or scanning UPC codes or by manual entry of charges. Other views show the main help menu, a typical small window used for entry of special items, the customer discount program window and the item delete window. The point of sale system is designed to work entirely from the keyboard. No mouse or other pointing device is needed. If a mouse is connected to the computer being used for point of sale, it should be placed so that its buttons cannot accidentally be pressed, possibly causing loss of focus of the point-of-sale window. If focus is lost, as indicated by a change in color of the title portion of the point-of-sale window, then focus must be restored by positioning the pointer on the point-of-sale form, and then pressing the left mouse button. The title portion of a window is the topmost bar that is usually blue. It is best to prevent accidental loss of focus by simply keeping the mouse clear of the working area. Note the quick help line in yellow background at the bottom of each window. These help text boxes are available on all of the windows in the Wise/POS system. POS Screen 1 is the main point-of-sale terminal window. When the system is first started or when a transaction is completed screen 1 is how the window on the screen should look. The system is waiting for the entry of a UPC number or one of the control keys or special two-digit codes. Normally you will scan the UPC number on products being purchased. After a few items are scanned into the system the window should look something like POS Screen 2. Checkout Operation POS Screen 2 shows three items scanned into the system. Note that there is a running total shown, and that one of the items has a quantity of 2. The quantity was entered by pressing the ?Q?, or F3 key, before scanning the UPC number, and then typing 2 in the quantity window and pressing enter. If the customer has no more items you can press the ?T? or F2 key to total the sale. After which the window should look like POS Screen 3. Preferred customer
discounts are a percentage discount which is set for each
manufacturer, or on an item by item basis. It may given to
a person or class of persons. Typical uses would be store
workers and/or senior citizens. To give a preferred
customer discount press the ?D? key at any time prior to
the pressing the ?T? or Receiving Payment On POS Screen 3, the sale has been totaled and the system is waiting for the entry of some form of payment. You can enter a cash amount in the box or press ?C? or F9 if the customer is paying by credit or debit card, or press ?M? or F10 if the customer has some manufacturers coupons to redeem. For this sale cash was entered as shown on POS Screen 4. An amount of $15.00 was entered in the "Amount Tendered" box above but the Enter key hasn?t been pressed. This is the last point in the transaction where you can clear the transaction and restart if an error was made. When the Enter key is pressed, the sales slip is printed, the cash drawer is opened, the transaction is entered into the database, and the stock count is corrected for each item on the list. POS Screen 5 illustrates how the window appears after pressing Enter. Completing the Sale POS Screen 5 is a view of the point-of-sale window after the amount tendered is entered and enter is pressed. The change to give to the customer is displayed and the sales slip is printed. To clear the screen for the next sale you can press the ?E? key or the F4 key. If you do nothing the system will clear the screen after a period of time. Checkout Help Screens POS Screen 6 shows the main help menu that will appear when the F1 key is pressed while the system is waiting for UPC numbers or special charge keys or codes. To return to the main POS screen from any help screen press the Esc key. Pressing one of the number keys <1> through <6> will cause the help screen for the subject listed to appear. Pressing the <1> key when this screen is in view will cause a listing of all of the items in the data base which were assigned local UPC numbers to appear. When the local UPC codes are displayed you can select one of them with the up/down arrow keys and press Enter to transfer the number into the UPC entry box of the main screen. If you simply need to find out which key or two-digit UPC code is needed to make a special charge this is the only help screen you need. Assume that you wish to make a manual charge the help screen indicates that pressing the F7, key will do this. From the above screen press the Esc key to return to the normal UPC entry mode. To see how the special modes look, press F7 to display the screen shown in POS Screen 7. Manual Cost Entry POS Screen 7 is a full screen view of the POS window after the F7 key was pressed. If you arrived here by a mistake such as using the wrong code or pressing the wrong F key, pressing the Esc key will close the small window without changing the sale in progress. The manual charge window is used to charge for items not in the store database. You can enter a quantity by pressing the ?Q? key or the F3 key if more than one identical items are involved. After the cost per item is entered, you will need to enter the category number so the system knows if the item is taxable. This small window is similar to the ones for returned merchandise, gift certificate sales, and discounts for store coupons. At any time during a transaction you can do one of the special functions by entering the proper code or pressing the proper F key. An additional feature of the Wise/POS system is the customer loyalty discount plan where discounts are earned based on amounts spent in a given number of previous days. To advise the system that the sale being entered is for a customer in the discount plan, press the "F11" key to open the customer number entry window as shown on the next screen, POS Screen 8. Customer Number Entry The customer number is the number entered in the phone number field in the customer database. If the customer?s phone number has the same area code as the store, only the last seven digits need to be entered. When the number has been entered, for a customer who is in the database, a new line of data boxes will appear at the bottom of the sales slip window. The next screen, POS Screen 9, shows how this display appears. Notice that the full phone number, name, the spending within the specified period, the discount percentage and discount amount on this sale are displayed. In this case no spending is on file so all are zero. Notice that the discount box is checked. This was done automatically because this customer had this option selected in his data file in the customer database. You can use this feature to give senior citizen discounts etc. The system will automatically give the maximum of the preferred customer or the earned discount, it will never give duplicate discounts. Another useful function is to delete an item from the sales slip. This function is accessed by pressing the "F12" key, whereupon the following screen, POS Screen 10, will appear. Deleting An Item From Sale Notice the small box below the total that is prompting for the item number to delete. If you wish to delete the White Wave Silk Soy Milk type the number 2 and press the Enter key. This will delete this item and correct the totals discounts etc associated with this item. A special credit
or store coupon discount. It is important to not use the store discount / special credit method for normal sale items as this eliminates the later buyers club or preferred customer discount if applicable from the entire sales slip, not just from one item. The sale price of items on sale should be entered in the database for that item. This will insure that the sale price is listed on the sales slip and will not remove the discount from other items that may otherwise be discountable. Gift Certificate
Sale Accounting. Returned Item
Accounting. Manufacturers
Coupons Redeemed Gift
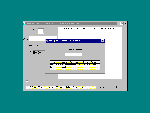
Certificates Shutting down the point of sale window
can be done by pressing the Alt + F4 keys. At this time a
small window will open with two graphic buttons on it. The
"Yes" button is enabled so you simply press |
|
|
