

System Description and Operating Instructions - Page 4 To navigate this online manual for Wise/POS quickly, use the Table of Contents links along the right side of the page to skip to the section you wish to read. If you have further questions, please contact us at wise@wiseinc.com. This documentation is proprietary to and is owned by Wise Electronic Systems, Inc., Windsor, PA, and is protected by United States copyright law. Copies may be made only to support licensed use of the software as defined in the WES Software License Agreement, by the licensed user specified therein. Copyright 2000
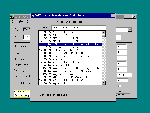
General This section describes the use of the product data maintenance module of the WES point of sale system. The Products module is used for building and maintaining the inventory database, especially for adding new products. A similar module called "Inventory" is provided for adding received items to the inventory and for correcting price information. The Products module has the ability to add and delete items and includes the ability to read catalog databases for easier addition of new items. After supplier and store data for your store is set using the "Files" module you will use this module to build the database of items contained in the store. When the program is started, usually from the Windows start menu as described for the POS module, the Product Data Maintenance window will resemble the screen view shown below as Products Screen 1. Data Entry Form Description The data boxes above the dark horizontal line all relate to the UPC number supplier and item number for the items in the store database. You can enter a complete UPC in the UPC # block or just the last five digits if a manufacturer has previously been selected. You can also select a supplier and if that supplier uses item numbers instead of UPC numbers, enter the item number in the "Supplier item #" box. The data boxes below the line are the data fields related to the item whose number is above the line. The "Description" and "Size" are simple text that will print on sales slips, shelf labels, orders, inventory, etc. The "Unit Price" is the cost of the item in the same quantities in which you sell them. The selling price is the selling price before discounts you wish to sell the item for. The category is used to identify the type of item and if it is taxed or not. The "Preferred Cust. Discount %" data box is for the entry of the percentage discount to give to preferred customers when such discounting is on a per item basis. Near the center of the screen are the scheduled discount data entry boxes. With this feature you can schedule a sale for the selected item, for some future date. Note that the sale price is needed here not a percentage discount. The dates are the first day the item will go on sale and the last day the item will be sold at the discounted price. The system has a wide range of discounting possibilities, see the section "Discounts" for a complete description of these features. The "Price Per" selector buttons allow the selection of per unit sales or sale by weight. If sale by weight is selected the checkout clerk will be prompted to enter the weight after scanning or entering a UPC. The weight could come from an automatic scale. Just to the right of center are the automatic sale system data boxes. The sale price is the actual sale price not a percentage. The first-day and last-day dates, are as they indicate the first and last day on which customers will be charged the discounted price. With this system you can schedule sales at convenient times in advance of the sale and the change down and up in price will occur automatically. The "Reorder Level" triggers the inclusion on automatically generator orders when the units in stock drop to or below this number. The reorder quantity is number of lots, or simply the number of items if the "Count per Lot" is set to 1, which will appear on generated orders when the reorder level is achieved. The "Units in Stock" is the number of items presently on hand. "On Order" is the number of items ordered but not yet received, and "Date Ordered" is the date the items were ordered. The block "Total Sold" is simply for statistical analysis and is the total sold since the last reset of the statistical data. The check box "Need Label" when checked will force the printing of a shelf label when "Labels Needed" is selected in the Inventory module. One of the useful features is the ability to retrieve data from catalog information supplied by some vendors. The following sequence shows how the data for an item is retrieved, and how the data shows the boxes on the screen. Starting from screen 1, set the pointer to the small down arrow to the right of the supplier ID box and click the left button. This will cause a drop down box to display all of the supplier names from the supplier table that was built using the "Files" module. The result is shown on the next screen view. Entering a New Item On Products Screen 2
you can see the supplier list has been displayed and supplier #2, "Tree of Life"
has been highlighted by moving the mouse pointer to that line. At this time the supplier
can be selected by clicking the left mouse button or by pressing the Entering Data for a New Item Products Screen 3 shows the results of selecting a supplier who has a catalog on file with the system, when a valid item number was entered in the supplier item # box. If the item is not already in the store database a catalog search will take place automatically when a catalog is on line for the selected supplier. The search for items both in the store database and in catalogs will use either the UPC number or the supplier item number. The number which was entered, either UPC or supplier item, determines which will be used in the search. Having found the item in the catalog, the system fills in all of the text boxes it can from the catalog information. You must now fill in the remaining items. When the system is finished filling in the information, the category number is highlighted because a valid category number must be selected before the item will be accepted. After selecting a valid category number you can use the Tab key, Enter key, or the mouse pointer to move to the next box. The reorder level and reorder quantity should be decided at this time, the quantity in stock can be filled in later if a new database is being built. The reorder level is the trigger point where this item will automatically be added to an order. The level is in units, not in case lots. The reorder quantity is case lots for the item shown, for items bought singly the reorder quantity is by the item. An important consideration here is that the item selling price must always be in unit price. If you sell by the single unit then the selling price must for one item. If you always sell a product by the six pack, or whatever, then the selling price must be set for that quantity. When all changes have been made to the data for an item the database must be updated. When all of the information is entered, point to the "Add New Item", and click the left mouse button. You can also use the Tab key to step through the boxes and end up with the button highlighted, at which time pressing Enter will add/update the item. The line under the "A" indicates that you can also use the Alt + ‘A’ keys to activate the update function when entering data for an item. If you wish to end the data entry for the present item without
modification of the database press the Searching The DB For An Item The manufacturer select window (illustrated in Products Screen 4) has a quick search box where you can type the first several letters of a manufacturer’s name to find it. To find "After the Fall", "Af" was typed in the search box. At this point pressing the ‘Enter’ key will, after a brief search, display all of the items listed in your database for the selected manufacturer. You can also use the mouse to scroll through the manufacturers and left click on the desired one. The next screen view shows a typical product display. Products Screen 5 shows the products already in the store database for manufacturer #74416, "After the Fall Products Inc.". You can now select one of the products using either the quick search method or by scrolling with the mouse pointer. Searching the database in this way is a fast method of finding one item in several thousand. The only slight disadvantage is that you do have to know the manufacturers name to use it. The next screen shows the item selected by the above method. Updating & Deleting Items Products Screen 6 shows a display of an item that was in the product database. This display is used for checking, editing, or deleting, an item already on file. In this case the item was found using the search method described above, but you can find items by entering or scanning in the UPC number, or if a supplier has been selected who uses item numbers, by entering the item number. Note that two action buttons are available, one will delete the item
from the database, the other will update the database information for the item shown. If
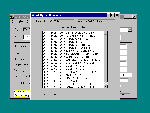
you are simply verifying information, or have retrieved the wrong item simply press the One additional function located on the menu bar at the top of the window is the "View" menu item. Clicking on this menu item or pressing Alt + "V" will display the next screen. Table View Of Products Products Screen 7
is the "View" menu item. This display appears when you click on the menu
item, or press "Natural.mdb". You can scroll both vertically and horizontally through the database to check items. The arrows on the UPC# box at the bottom of the screen may also be used to go the first and last items, or to step through the items. At the time this document was prepared this screen was for viewing only. No modification of the database can be made from this screen. To return to the products window form, click the "Back to Form" button or press the Alt + "B" keys. From the main Products window you can exit the Products module by clicking on the "Exit" menu item, by clicking on the small x in the upper right corner of the window, by pressing the Alt + "E" keys, or by pressing the Alt + F4 keys.
|
|
|


