

System Description and Operating Instructions - Page 5 To navigate this online manual for Wise/POS quickly, use the Table of Contents links along the right side of the page to skip to the section you wish to read. If you have further questions, please contact us at wise@wiseinc.com. This documentation is proprietary to and is owned by Wise Electronic Systems, Inc., Windsor, PA, and is protected by United States copyright law. Copies may be made only to support licensed use of the software as defined in the WES Software License Agreement, by the licensed user specified therein. Copyright 2000
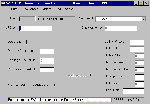
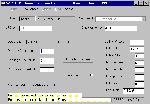
General This section describes the use of the inventory data maintenance module of the WES point of sale system. The Inventory module is provided for adding received items to the inventory, correcting price information, and recording items removed from inventory for promotional purposes or due to spoilage. Additional functions of this module are the printing of orders, shelf labels and the printed inventory. When the program is started, usually from the Windows start menu as described for the POS module, the Inventory Maintenance window will resemble the screen view shown below as Inventory Screen 1. Inventory Module Screen The top section of this screen works exactly like the products module described in the last section, except that catalog search is not available because this module can not be used to add new products to the store database. The "Find" function on the top menu also works exactly as described for the products module. If you locate a product by any of the three methods available the form will be loaded with the information for that item from the database. A typical item can be seen on Inventory Screen 2. Updating Inventory Here is the display for an item in the store inventory. Because the most frequent use of the this window is to add items to the inventory as they are received, the system automatically moves the focus for key strokes to the text box labeled "Quantity received" and selects the zero there. At this point you can type the number of items received, then press the Enter key. If you do this, the "Update" button will be enabled so that one additional press of the Enter key will update the inventory. You will notice that the "Update" is disabled when you enter a quantity until you press enter to force the update to the units in stock value. The person entering the received items into inventory should also check the item cost and selling prices to make sure that they are up to date. The ability to keep your selling prices current is one of the best reasons to use a point of sale computer system. The two text boxes under the one for Quantity Received are for items removed from the inventory without being sold. If you lost some of these items to spoilage enter that number in the text box labeled Spoilage Deduct Qty and the Units in Stock will decrease by that number. The data regarding the loss will also be added to the Spoilage.mbd database so that you have a record of the loss. The box labeled "Promotional Deduct" works like the spoilage except that the information is recorded in a different database so that you have a separate record of these items. Promotional items are those which were given away for things like benefit auctions, etc. With your reorder levels set, and an accurate running inventory on file, automatic generation of orders can be very useful in insuring that you don’t have empty spaces on your shelves. This important task is activated by clicking on the "Orders" item on the menu bar at the top left of the window, or by pressing the Alt & ‘O’ keys. When you do this, and after a short search indicated by a displayed progress bar, the next window will be displayed This window lists all of the suppliers for whom there are items having units-in-stock below the reorder-level number. The number of items along with the approximate cost of the order is listed. To view and perhaps print one of the orders use the pointer to highlight the line on the list and click the left mouse button. When a supplier has been selected for order generation, and after a short search delay a window like the next screen view will be displayed. This screen shows the order information essentially as it will be printed. You can call orders off of the screen or print them on paper for marking up manually, or for sending or faxing them to the supplier. You can also print the order to a file where it may be edited manually, if editing is needed, for printing, or sending directly from your computer via E-mail, or fax. A third button on the bottom of the window marks the items as ordered so they don’t show on the order the next time the orders function is activated. It isn’t necessary to mark items as ordered as they will automatically be removed from future orders when the quantity in stock number is adjusted when the items are received. For suppliers who don’t back order items it is probably best to not mark the items as ordered, so that those not received in the next shipment show up on the next order. Any of the three available functions can be executed by moving the pointer to the desired button and click the left mouse button or use the Alt & ‘P’ or Alt & ‘F’ or Alt & ‘M’ keys. To close the order window click on the small x in the upper right corner of the window, click on the "Done" menu item or use the Alt & ‘D’ key combination. The next screen view shows the "Print Labels" drop down menu which can be activated by pressing Alt & ‘L’ or by left clicking while the mouse pointer is pointing to the menu item. The "Print Labels" drop down menu item in the above screen view shows the print options available from the inventory module. The "Price Labels Needed" option prints labels for all of the items in the products database which have the "Need Label..." box checked. This is most useful when the system has been in use for a while and all of the labels had been printed. Then when a selling price changes, this box will be set to checked and when the "Price Labels Needed" option is activated, the label will be printed along with all the others which have "Need Label" checked. The "Price Labels by Manufacturer" prints all of the labels for a selected manufacturer. The "Price Labels by Item" prints a label for a selected item or several sequentially selected items. A remaining item on the Print Labels menu is the "Setup" the setup items on this drop down are the first label location and the space between labels. This allows you to adjust the vertical starting location of the price label printing, and the vertical space between the labels in the smallest possible units. The system is designed to print price labels on 1" X 2-5/8" labels three across, thirty to a sheet. Use of the Avery Laser Label #6231 or similar is recommended. Under the "Print" drop down menu is an "Inventory Printout" option which prints the entire inventory for the store. This printout is designed for inventory checking. The items are listed by manufacturer, and a space is provided to write in the actual count. You will find that, by spot checking, the items on the shelf when additional stock is added, that your inventory counts will probably be quite accurate. Taking the time to print the full inventory a month or so after this system is started may be valuable in getting your counts accurate. You may wish to print the inventory from this module near the end of the year also so that after the year end you can print your inventory with cost extensions and totals from the Reports module for use in tax return preparation. This chapter describes the numerous methods available for giving automatic discounts within the Wise/POS system. The automatic discount methods provided by the system are:
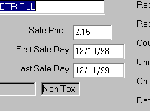
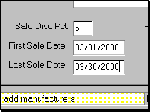
Store wide special sales: The discount will apply to all items in the store for as long as the discount is set to anything other than 0. When the store wide discount is changed the main point of sale programs must be restarted in order to have the new value take effect. Date triggered sale on selected items: Note that the value to enter in the sale price window is the actual sale price and not a percentage discount. The sale price will be in effect on all days between and including the dates entered. For a single day sale the first and last sale days will be the same. Date triggered sale by manufacturer: Note that the value to enter, in the sale price window, is the percentage discount to be applied to all items of the selected manufacturer. The sale price will be in effect on all days between and including the dates entered. For a single day sale the first and last sale days will be the same. Customer loyalty "Buyers Club"
discounts: To participate in the program customers must be in your customer database. The module called "Customers" is used for customer database maintenance. Instructions on the use of the Customers Module are included as a separate chapter elsewhere in this manual. Some stores enter the customer immediately so that the purchases made that day will show on the customers record, and if the total purchases result in a sufficient amount they may get an immediate discount. Another approach is to have the customer fill out a small form with the needed data and then enter the data from the office computer or at the checkout computer when a slow period occurs. Which procedure is better for customer loyalty, or buying motivation, is open to debate but the latter approach is favored, because if the checkout is busy it may not be wise to delay other customers while entering data for the new customer. The latter method may also be better for your bottom line as the purchases on the first day don’t get entered into the record and no immediate discount is possible. The customer can be told that the next time they come in, and give their phone number to the cashier, their buying record, and possible discounts, will begin. When adding items to the sales slip, manufacturers and store-wide discounts are handled first by adjusting the retail price as indicated by the discount. A special sale item overrides manufacturer and store-wide discounts. The special sale price will be used in place of the adjusted retail price. Manufacturer’s discounts, store wide discounts, special sale price discounts, and preferred customer discounts are taken prior to totaling the sale, and thus before sales tax is computed, because they are a reduction in the selling price of the item. Preferred customers and buyers club members can not use a store discount coupon. They must make a decision to either take the coupon discount or the overall discount not both. If they use a store discount coupon the preferred customer and buyers club discounts will not apply. Gift certificates are not discounted when sold. The purchase price of the certificate is counted toward the required spending for increasing the discount amount. The person who uses the gift certificate will get any discounts they may be entitled to when the certificate is redeemed. Discountable amounts are used for preferred customer and buyers club discount calculations. Previously discounted items, are excluded from the discountable amount totals. Types of discounts that are selectively removed are items that are on a manufacturer’s discount, a store wide discount, or a special sale. The system always tests for a greater discount for a preferred customer who is also in the buyers club program. The largest discount will be given. A preferred customer who is a big spender may get a discount that is larger than the set percentage. A customer that is not a big spender will get at least the percentage set for preferred customers. Remember also that the preferred customer discount can be set by manufacturer or on a per item basis, so you can give a higher percentage on high markup items. |
|
|
