

System Description and Operating Instructions - Page 6 To navigate this online manual for Wise/POS quickly, use the Table of Contents links along the right side of the page to skip to the section you wish to read. If you have further questions, please contact us at wise@wiseinc.com. This documentation is proprietary to and is owned by Wise Electronic Systems, Inc., Windsor, PA, and is protected by United States copyright law. Copies may be made only to support licensed use of the software as defined in the WES Software License Agreement, by the licensed user specified therein. Copyright 2000
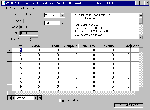
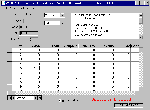
General This program module displays financial information about the store. If you wish to keep your data somewhat private you should remove this module from all computers on a networked system except for the one on the office computer. Start this program module using the same procedure as for other modules in the system. When the Reports program starts, the file loading and processing time takes a few seconds. When the program is running a screen similar to the following is displayed. Data Reporting Screen The sample database used had no sales in it so the columns are all zero, and this is how your reports screen will appear when you test drive the system prior to putting it into use. The low markup box indicates how many items in the data base are priced below a markup of 25%. Unless you normally operate on a 25% markup you should check the low markup list under the "View/Print" menu item to pick up any pricing errors, if this box isn’t zero. You can view the totals from each day in the current month by
scrolling using the pointing device on the scroll bars at the side and bottom of the
spread sheet style display. The left most column is the day of the month. The column
labeled credit is the total of all credit or debit cards. Sales totals are added to this
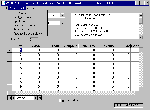
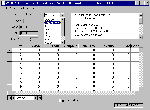
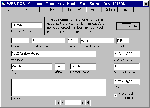
column when the If you drop down the menu box under the "View/Print" menu option, using methods described for other modules, the next screen view will appear. Printing Financial Summaries This screen view shows the lists that can be viewed or printed. This drop down menu is brought into view by left clicking the "View/Print" menu item. You can view any of the items on the screen, except for inventory printout which doesn’t display for viewing prior to printing, and then elect to print them or not. The "Print Summary" function prints the summary list shown on the screen. The most frequent use of the summary print function for selecting a previous month, to print the month end totals. These month end totals can be transferred to the business accounting system, used for sales tax accounting, etc. The spoilage and promotional item reporters display, and optionally print, a list of the items removed from inventory during the month. The items are removed using the functions provided for this purpose by the Inventory module of the system. The inventory printout prints the entire inventory, including costs and totals. This is different than the inventory print function provided by the Products module, which is mainly for assuring the item count accuracy. The inventory print function provided by this module can be used to print the inventory at the end of the previous year. This is useful early in the new year when working on taxes for the previous year. The "Product Sales Analysis" menu item displays an analysis of sales from the last time the totals were reset. This function also allows the resetting of the totals. Historical sales data is maintained on a daily basis and totals are automatically computed on a monthly basis. The inventory data is always current (not historical) except that at the end of the year the entire products data base is preserved and a copy is made to carry into the next year. This is done so that the year end inventory is always available for printout. Because the programs only test for a day change when they are started we recommend that the programs be shut down at the end of each day. The computers can run continuously if desired. This is especially important on the last day of the year to insure that the inventory for the year just ended is saved. This is usually not a problem unless your store is open 24 hours per day, every day of the year. It is important that the date and time be correctly set on all of the computers in your system, to insure that the historical data is saved correctly. The date and time is displayed on most of the screens to help make users aware of the computer time settings. The help files provided with your operating system describes the method used to set the computer time clock. To obtain historical data you need to select a previous month, and perhaps a previous year. The next screen view shows how a previous month can be selected, by moving the mouse pointer to the small arrow next to the month, and clicking the left button, to drop down a list of previous months available. Viewing Previous Months' Totals This screen view shows the drop down month selection list. You can now select, as indicated by the highlighting, any previous month in the year and click the mouse button, or press enter, to display the data for that month. A similar drop down selection process is available for any previous year that the store has been in operation. Remember that the inventory totals always reflect the current values when viewing data for the current year and thus will not change as you view different months. When viewing data for previous years the inventory totals will reflect the totals at the end of the selected year. The next screen shows how to make a modification to one of the daily entries if an error was made. Correcting Financial Data On this screen, the box at the bottom near the center labeled "Allow Update", was clicked using the mouse, to change it to checked, at which time the red label "Updating Enabled" appears. With the red label you are warned that you can now make changes to basic financial data. You should note the value in the box you wish to change, and make any changes with care, because you loose any value in a box after you type over it. After enabling the updating, the cash received on the fifth day of the month was changed from 0 to 100 dollars by highlighting the old value using the mouse pointer and typing in the new value. We force you to check the box before allowing any updates to help prevent accidental loss of data, and to insure that the update was accomplished as desired. At the moment you check the box to allow updates the screen is refreshed from the database to insure that the latest data is shown. Then, after you make the change, you should click the check box again to turn off the updating. When you turn off the updating the database is updated and the screen is refreshed from the database so you can see that the change occurred. General This section describes the use of the Customer database maintenance module of the Wise/POS system. The Customers module is used for building and maintaining the customer database. This database is used for keeping information about your customers for use in the discount program based on customer spending. The same database may be used for direct mailing or other similar uses. When the program is started, usually from the Windows start menu as described for the POS module, the Customer Data Maintenance window will resemble the screen view shown below as Customers Screen 1. This module can be started while the main POS program is running at the checkout counter to add a new customer. This is only practical during periods of low checkout activity, so it is usually better to have the customer fill out a small form with the needed data and then enter the data from the office computer or at the checkout computer when a slow period occurs. Entering Customer Data This is the screen where most of the work will be done on the customer database. The record shown is the one and only record in the database that ships with the software. The labels on the various boxes indicate what you should enter in each box. You can type your first entry over our test data. Subsequent entries can then be made using the "Add" function, which may be invoked using the mouse, or by pressing the Alt and A keys simultaneously. Be sure to press the Alt key first. |
|
|
